Friday, March 1, 2013

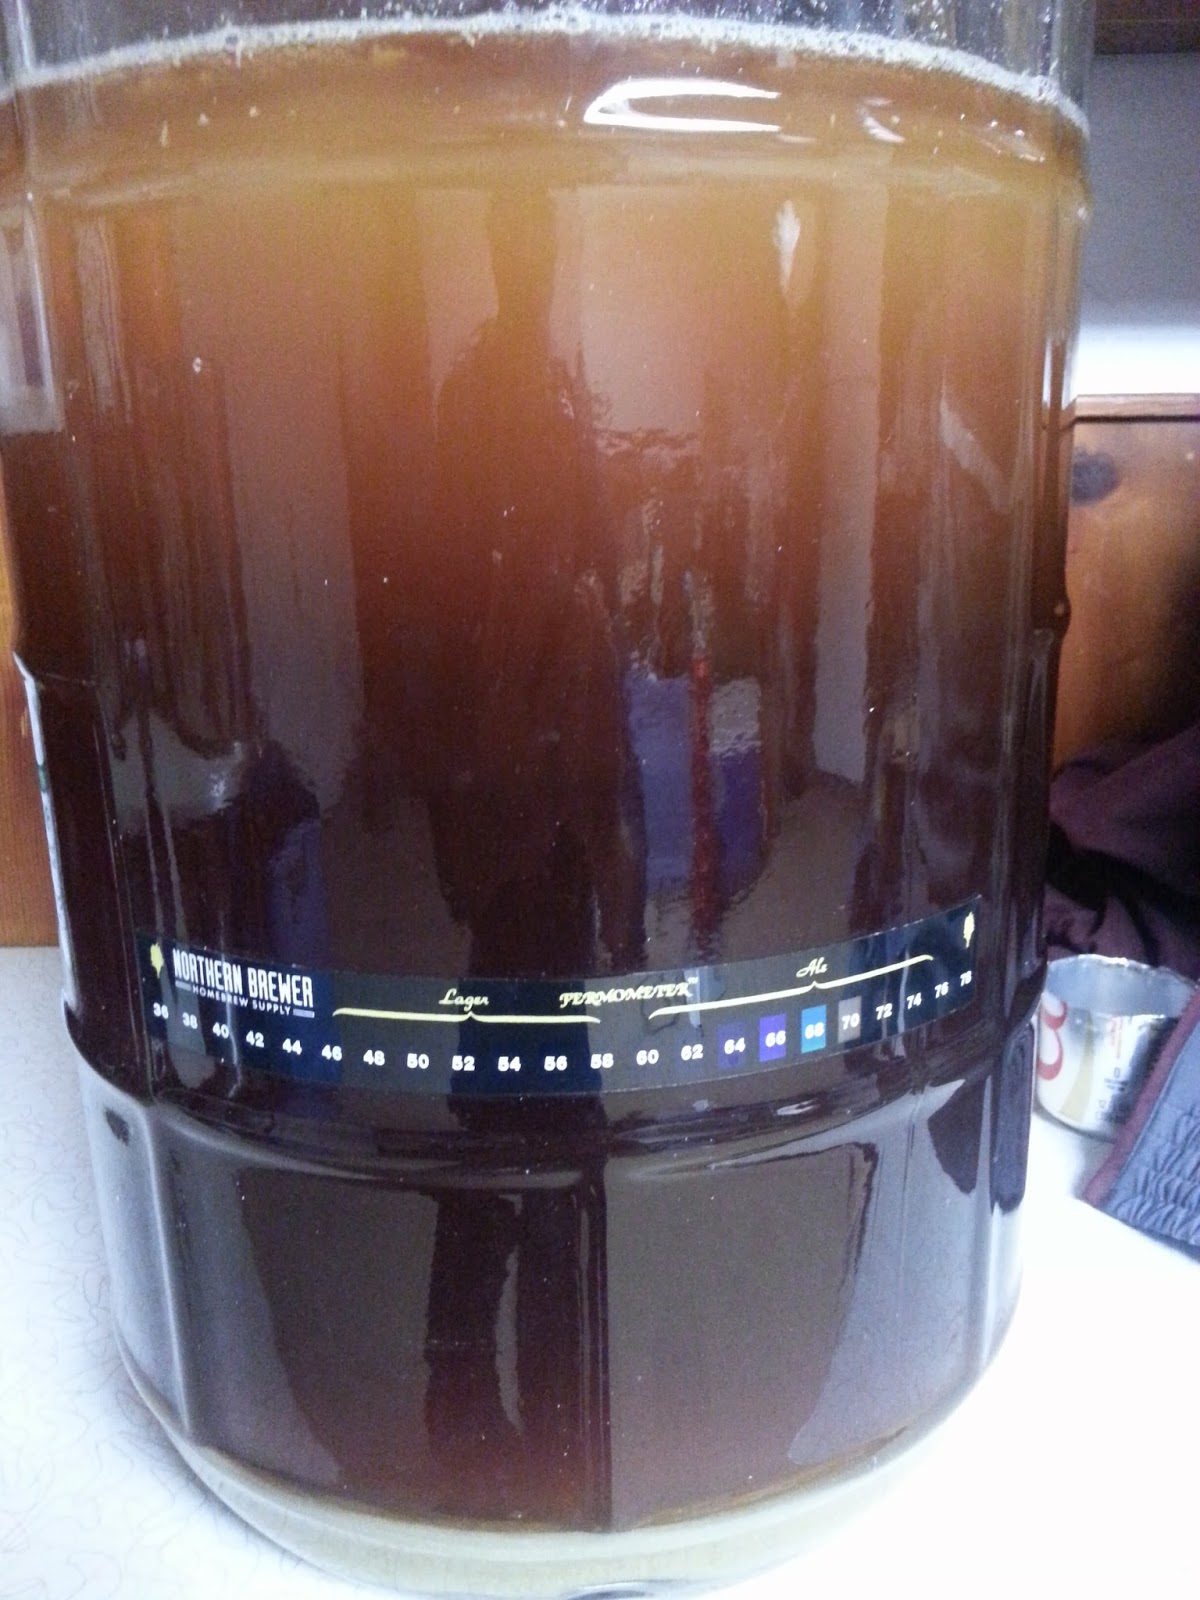
Dead Ringer IPA water off: tap vs spring water... conclusion it's a draw!


Trouble Oh trouble set me free I have seen your face 
And it's too much too much for me 

So, I've been having some trouble with haze in my all grain brews, thus the Cat Stevens, and I think I've tracked it down to the mash. I'm either getting some starch haze due to low mash temps or perhaps some grist due to crappy recirculation. Also, I've been getting a non-hop bitter taste in my beers that I think is from the chloramine in the water, despite 1/2 a campden tablet. Ahh, so many things to work out. Well, I'm always up for a challenge and decided to have some fun and to do a brew-off to work out some of the kinks in my brewing process. I brewed two 5 gallon batches in the same day... took 9 hours@~@. In the right corner we have the clean the clear the predictable "spring water" (SW) from a grocery store near you and in the left corner we have the cheap the tainted the hopeful "tap water" (TW) that we've prettied up with an activated carbon filter from More Beer and a full campden tablet.  I'll let them slug it out in my mouth in a month or so:) We'll see about the bitter flavor after they brew up... should go faster with the use of a starter this time... actually had to use a blow off tube!

And while I'm at it, I might as well crack that haze nut: I upped the mash time to 90 min and made an effort to step up the mash temperature during the 90 min period. To make sure my mash is actually doing what it's supposed to, convert starch to maltose,  I monitored starch conversion with an iodine test so I could be  sure the job was done before moving on.... and it does in fact take more than 60 min in my setup. I also ditched the hop bag and added whirlfloc to the boil, hoping to get better break in my boil. In the end there was a lot more trub to deal with, but what do you know, clear freaking beer! Woo!!

Finally, I got a lot of good "advise" from the Beer Geeking guy who seems to have gone through a lot of trial and error before attaining "good-brew" status, and he has kindly distilled those experiences in his blog, check it out.

So, back to beer.  What shall I brew?  Well that dear ringer IPA is damn fine if I say so myself and 4 cases sounds good to me!

Dead Ringer is an homage to a benchmark of the American IPA style that’s brewed in Michigan. American base malt and crystal malt create the big body and supporting grainy sweetness, while charge after charge of 100% Centennial hops deliver pronounced bitterness with a dominant citrus aroma and flavor. In the glass you get a pale amber color, hop intensity and malt density - substance with the soul of a session beer.

O.G: 1.064 READY: 6–8 WEEKS
Suggested fermentation schedule:
- 1–2 week primary; 2–4 weeks secondary;
2 weeks bottle conditioning


STARTER CULTURE
1300ml bottled water, 1 cup light DME, boil 10 min, cool with ice bath in pot, add to 2L flask, pitch 100ml rehydrated US-05 yeast, and incubate on stir plate for 17-20hrs. Used this stir plate kit: Stir Starter


MASH INGREDIENTS
- 11 lbs. Rahr 2-Row
- 1 lbs. Briess Caramel 40

MASH SCHEDULE: SINGLE INFUSION
Sacch’ Rest: 152° F for 60 minutes
Mashout: 170° F for 10 minutes

Spring water mash: 16q of 170F water to a mash temp of 152F. After 40 min temp dropped to 150, 60 min down to 146.5. Added 2q boiling water to 150F. At 70 min 2q boiling water added to 154.5. At 80 min 2q boiling water to 158F. Forgot gypsum so added 1tsp and 2tsp pH 5.2 mix; pH went from 5.6 to 5.2. At 90 min added 5q boiling water for mashout at 163F for 10 min.  Recirculate: flush 2 qal quickly to pull off grist from bottom, then slowed to 1q/min for 10min. The out flow was very clear! Sparge water at 170F, 5gal (2tsp 5.2 added). My boils have reduced the wort a bit low so I added 7.25 gal to the pot. Heat to boil 15min. OG 1.055 but expected because of the extra wort in the brew pot (boiled down to 6 gal).

Tap water mash: tap water was run through activated carbon filter and treated with 1 campden tablet the night before. Strike water heated to 175F, 14q added to 153F. After 10 min added 1tsp gypsum and 2tsp of pH 5.2 (another 2 tsp to sparge water). At 30 min 149F. At 45min 3q boiling water to 154.5F. At 60 mi added 2q boiling water to 158F. At 90 min added 3q of boiling water to 163F for 10 min. Recirculate: flush 2 qal quickly to pull off grist from bottom, then slowed to 1q/min for 10min. Clear out flow! Sparge water at 170F, 5gal. My boils have reduced the wort a bit low so I added 7.25 gal to the pot (boiled down to 6 gal). Heat to boil 15 min. No OG because I dropped my hydrometer!!!

BOIL ADDITIONS & TIMES
0.75 oz. Centennial (60 min).... actually added 1oz
1 oz. Centennial (20 min)
1 whirlfloc tab (10 min)
2 oz. Centennial (5 min)
SW boil cooled in 35min to 72F while TW boil cooled in 50min. About 1 inch of trub in each carboy.

DRY HOPS
1 oz. Centennial – add to secondary fermenter
one to two weeks before bottling day

YEAST
DRY YEAST (DEFAULT): Safale US-05.
Optimum temperature: 59–75°F
Pitched 600ml starter to SW wort at 72F, and 600ml to TW wort at 70F.

FERMENTATION:
Pitched 600ml of a starter culture into SW brew at 72F and the TW brew at 70F (2.5 hours later). SW showed activity 4 hours later while the TW brew took a bit longer ~8 hours. Both were fermenting strong with a hefty head of krausen the next day and were holding at around 70F (see video below). I had to put a blowoff tube in the TW batch on day two because it clogged the airlock. The fermentation continued between 66 and 70F for 4 or 5 days then slowed and the krausen fell at 6(SW)-7(TW) days. Racked to a secondary on the 8th day. I used a CO2 bike tube inflator to flush CO2 into the secondary before racking. A quick taste of each and the SW seems a bit more crisp than the TW, but both taste good, nice and bitter needing those dry hops! After 3 days in the secondary the TW batch looks more clear than the SW batch.  I added 1oz of centennial hops after a week in the secondary, then bottled 6 days later. The temp ranged between 64-66F. The FG on both beers was 1.01, so around 6% alcohol with the OG of 1.055.

BOTTLING
At bottling (4oz corn sugar) both beers tasted good!  The SW is a bit smoother on the mouth and the TW has a more crisp feel, which I prefer in an IPA. Both brews were also very clear, so I think my "flush out" before the laughtering helped a lot, that and the extra 30 min in the mash. I let the bottles carbonate for 3 weeks then chilled to 32F. A cold haze formed and dropped out after two weeks.

CONCLUSION
Both beers are a bit on the bitter side (maybe shouldn't have added the extra 0.25oz of hops at 60min) and I just feel like they need more hop flavor... maybe a few more ounces in the dry hop.  Head retention is good on both. As for off flavors, I perceive a bit of solventy notes in both... maybe some fusel alcohols from the high ferm temps.. will try to keep them down at 66-68F, at least for the first few days.  Besides that there are distinct differences in flavor. The SW is smoother feeling, but almost too soft, especially for an IPA. The TW is more crisp with a drier finish. At this point, both my wife and I like prefer the tap water version. Update, after 2 months in the fridge the beers have matured nicely, and the TW has a more apparent estery profile, one that is less prominent in the SW. Due to that the SW takes the lead in flavor, but both beers taste good and since the esters are likely due to the fermentation temp, I'd say that both the tap water (carbon filtered and campden tab) and spring water work just fine. It's a draw.

The brew


Iodine test of Spring Water mash

OG 1.055: A little low. Clear wort!

Pitched that yeast!


 Tap water mash iodine test.

Tap water brew.

Pitched yeast... broke my hydrometer!!


16 hours after pitching

Day two and had to go blowoff on the TW.

TW Day 2: krausen!

Dry hops

4 cases of brew!


Wednesday, February 6, 2013

Kiwi Express IPA- All Grain Brew.. strange, but strangely good!

I'm a big fan of IPAs with lots of bitter flavor and hop aroma, and this one (again from Northern Brewer) looked both exotic and tasty so I thought I'd give it a try. I've never worked with New Zealand hops, but based on the smell when opening the package, I think I'm already becoming a fan! The wort had a nice light grainy flavor balanced with lots of bitter flavor and aromatics from the hop additions. I think it's going to delicious!

Kiwi Express Recipe from Northern Brewer

The setup is old (West Coast-style) but the punchline is new. A big but uncomplicated malt bill plus Wyeast 1056 set the stage and then stay out of the way of the ensuing lupulin circus. Via a blend of New Zealand
hop varieties, exotic flavors and aromas permeate your sinuses - sticky tropical fruit, lime oil, equatorial flowers, Tellicherry peppercorns - underpinned with an undeniable earthy funk. All senses saturated with
hoppy hues of green and yellow.

O.G: 1.061 READY: 6 WEEKS

Suggested fermentation schedule:
- 1–2 week primary
- 2 weeks secondary
- 2 weeks bottle conditioning

MASH INGREDIENTS
- 11.5 lbs Malteurop American 2-row Pale
- 0.5 lbs. Briess Caramel 20

MASH SCHEDULE: SINGLE INFUSION
Sacch’ Rest: 152° F for 60 minutes (Added campden to all the water. Added 1 tsp of gypsum and 2 tsp of 5.2 pH phosphate buffer from Five Star to the mash tun. Added 4.5 gal strike water at 166.5F to get a mash temp of 150F, let incubate for 35 min then added 2 qt of boiling water to a mash temp of 155F for 25min. Recirculated for 25 min but the wort was still pretty turbid... starch haze?)
Mashout: 168° F for 10 minutes (I skipped the mashout)

BOIL ADDITIONS & TIMES
0.5 oz New Zealand Nelson Pacific Jade (In bag, 60 min)
3.5 oz Kiwi Express Blend (In bag, 10 minutes)
               -Kiwi Express Blend: NZ Pacific Jade 3.5 oz, NZ Motueka 2 oz, Green Bullet 2 oz
(The boil had lots of hot break/trub. Chilled with wort chiller for 30 min to 70F. I tried a Bazooka screen with a muslin bag around it to help reduce trub in the carboy but the trub clogged it, so I removed it and just poured, leaving most of the trub behind.  About 1/3 made it into the carboy. Aerated for 45 seconds with an oxygen wand, then pitched the yeast. O.G. 1.062)

DRY HOPS
4 oz Kiwi Express Blend

YEAST
DRY YEAST: Safale US-05.
Optimum temperature: 59–75°F
  -Rehydrated in a cup of warm water for 30 min before pitching


PRIMING SUGAR
- 4 oz Corn Sugar


FERMENTATION
- Started off at 70F and jumped up to 75F overnight, which is the upper limit for the US-05 yeast, and the fermentation was very active. By the end of 24 hours the temp was down to 73F. Overnight on day 2 the temp dropped to 70F and the fermentation slowed a bit but was still very active.). Temp was between 70 and 68F for 9 days. Racked to secondary FG 1.008 and 7% alcohol. The beer had a nice bitter to it and a tad estery from the high fermentation temp. After 24 hrs the 4oz of dry hops were added and steeped at 68F for a week. The beer was still pretty hazy so I tried adding 7g of polyclar 10 and cooled to 38F for 3 days, with only a mild clearing but still a pretty significant haze even after warming back to 60F. I think I might have a case of starch haze.... should have added whirlfloc t the boil. I'll try decanting a bit of beer and adding some amylase to see if that has any effect. If so I could treat the whole batch like this guy Starch haze. At this point I'm struggling weather or not to leave well enough alone but my RyePA was hazy too and tastes off, though the haze is settling on that one and the cleared part tastes good. Instead of adding amylase I just decided to bottle after 2 weeks in secondary. I was going to add more yeast to aid carbonation but forgot. After a week in the bottle I see yeast at the bottom, which is a good sign the polyclar didn't strip out too much yeast,  and have some carbonation... and the beer is actually fairly clear believe it or not. It tasted ok after a week in the bottle but not very hoppy. I'll let it condition another week and see what happens.

Conclusion
After a month in the fridge all the cold haze has cleared and the beer tastes much cleaner. I think next time I'll work on better mash practices, add whirlfloc to the boil, keep the fermentation temp below 70F, and let the brew condition a bit more in the carboy after fermentation to clean up some of the "green" flavors. But overall it's turning out to be a decent brew and I do detect a lot of the flavors mentioned in the intro. A very different brew than I'm used to, having imbibed so many California brews loaded with Cascade and Centennial hops. If you like exotic, then you will enjoy this brew.  Update: You know, after drinking this brew for a few weeks, I'm really stating to like it. Very unique flavor!


The Brew... After settling for a month in the fridge

The Brew, pre-chiling... lots of haze


Who knew an electric turkey fryer would be a great strike/sparge water heater!!!


Milk crates make a great three tier setup.  Don't wrap a muslin bag around your brew kettle bazooka filter screen like I tried, it clogs!! Just pouring off and leaving the trub is still the easiest method I've found so far.


The wort cleared some but not as much as other batches. A little foil around the burner works great and cuts down on both time to boil and propane usage.

A spatula and a binder clip make a great hop bag setup; it's much easier to add in later hop additions, just make sure to use a large bag so the hops get good contact with the wort.


30 minutes after pitching, and the trub has settled. I might remove the trub next time by racking to another carboy to see if it affects the taste of the final beer.


24 hours after pitching the yeast


Krausen on day 2

Dry Hops.. no bag this time.


Saturday, February 2, 2013

Oatmeal Stout All Grain Brew... fail!

OATMEAL STOUT (All Grain): Excerpt from Northern Brewer Kit instructions with notes ()

Winter in the bay looks like spring but my heart feels the winter and wants me to have something toasty and warm to sip on in the evenings. I brewed an oatmeal stout years ago and really loved it, so I through why not revisit that old brew.  And once again, Northern Brewer had a great all grain kit and since I still haven't done all my brewing homework an all grain recipes (or am too lazy), I decided to go with that one instead of figuring out my own recipe.  It was also my first try with my new all grain setup (will blog about that later) so I was excited to get in there and give it a whirl. I think I still have some kinks to work out to get the brewing process smooth as butter, but today went pretty well.  And of course, I need to thank my awesome wife for watching the sick baby while I brewed... you are awesome babe!!!

From NB:
NB Oatmeal Stout Recipe

Who doesn’t love oatmeal stout? It’s impossible not to love oatmeal stout. Full-bodied with a silken texture and a gentler roast profile than their Irish and American cousins, this ebony ale is rich and substantial. Almost hidden under strong notes of dark chocolate, figs, and light-roast coffee you’ll find a subtle nutty, grainy flavor from flaked oats. A long-lasting raft of beige foam floats on the jet-colored pint and laces the glass all the way down. This stout is wonderful by itself, but if you’re looking for a dessert beer pair it up against a flourless chocolate cake, truffles, or even a raspberry tart.

O.G: 1.042 READY: 6 WEEKS

Suggested fermentation schedule:
- 1–2 weeks primary; 1–2 weeks secondary; 2 weeks bottle conditioning

MASH INGREDIENTS
- 6.5 lbs English Maris Otter
- 1 lb Flaked Oats
- 0.5 lb English Roasted Barley
- 0.5 lb English Chocolate Malt
- 0.5 lb English Dark Crystal

MASH SCHEDULE: SINGLE INFUSION
-Sacch’ Rest: 153° F for 60 minutes (I added campden tabs to all the water to kill the chlorine. Strike water for 12 quarts 166.5F with a grain temp. of 63F. The mash temp was 153-150F and went for 70 min. My house water is soft so I added 1 tsp gypsum, the pH was 5.8, so I added 3 tsp 5.2 pH stabilizer from Five Star Chemicals.)
-Mashout: 170° F for 10 minutes (Mashout 1gal boiling water to a temp of 158F for 10 min)
*** I used my ice cream motor mash mixer and it worked great!!

BOIL ADDITIONS & TIMES
-1 oz. Glacier for 60 min. (Boil 60 min, chill 30min to 70F, O.G. 1.045, temp corrected to 1.046. The wort has a nice roasted, bready flavor with a kick of bitter.)

Total time, including cleaning: 5 hours.

YEAST
-Wyeast 1945 NB NeoBritannia. Flocculation: Moderatehigh. Attenuation: 72–77%. Temperature Range: 66–74 F.

FERMENTATION
Aerated wort with oxygen 45 sec, pitched yeast at 70F. Robust fermentation started after 12 hours and slowed after the second day. At 4 days the krausen was still on top and the fermenter was bubbling very slowly. Temp 70F. On day 5 there was no visible sign of fermentation and the krausen had not fallen so I gave the fermenter a shake and the krausen fell, 68F. Day 5 there was a thin new layer of krausen and some signs of fermentation, 66F. Racked to secondary after a week cooled to 57F. Racked to bottles after 11 days.

After two weeks in the bottle the beer wasn't very carbonated and tasted sour... I'm wondering if I rushed the fermentation by shaking the krausen down or perhaps I didn't pitch enough yeast to fully ferment and condition. After 4 weeks the sour flavor has diminished a bit but the beer still tastes bad. I don't know, something is off with this batch. The beer tasted the same going into the bottles and I noticed the bung was a bit loose on the carboy... oxidation? Or maybe it just needs more conditioning, so I stirred up the yeast off the bottom of the bottles and will let it go another week.  After awhile in the fridge the flavor has improved but it's not my favorite... my wife likes it though.

CONCLUSION
At first, I thought I did something wrong with this brew because it just didn't taste the way I expected it to, i.e. Samuel Smith's oatmeal stout. However, I just cracked open a New Belgium 1554 and it tastes the same! So if you like 1554, you'll like this brew. In my opinion, it's a fail... and so is 1554.


The brew


 Right after pitching the yeast.

Still too much trub for my tastes. Will add a finer screen to the strainer next time.


 Krausen at day 2

Saturday, January 26, 2013

Mashing made easy: ice cream maker mash mixer

In order to maximize the efficiency of starch conversion to fermentable sugars during the mash, it is essential to maintain an even temperature distribution by thoroughly mixing the grain and water.  You can do this manually by opening the lid and stirring every 10 or 15 minutes, but automating this process will free you up to do other things and make the brewing process more enjoyable. I have looked around and seem many creative ideas homebrewers have come up with, but none more simple and inexpensive than using an old ice cream maker motor!

Here's a video of one simple design:

This video inspired me to attempt to make my own mash mixer with an unused ice cream maker in my garage that I purchased off amazon for $25.


I have a 10 gallon mash tun from Northern Brewer:
All-grain System Mash Tun - 10 gallons
Pic of 7529

In addition to the ice cream maker, I bought a 2' x 1/2" copper pipe ($5), male and female fittings for the pipe so that I could easily detach it from the motor ($5; optional), and some zip-ties ($2).


Here's how I made it:
1. Cut the pip into a 5" and 15 1/4" sections. Add the male fitting to the short tube and the female to the long one. Solder them in place.

2. Epoxy the lid of the ice cream to the motor shaft being sure not to glue the motor to the housing (it won't turn if you do!). Then glue the shore pipe into the inside hole of the lid.


3. Cut 2" off the bottom of the outer ice cream bucket.


4. Drill an 1 1/4" hole in the top for you mash tun lid. Do it slowly or the plastic will crack.


5. Place the blue ice cream maker bucket on top of the mash tun lid, centered. Mark 4 spots on the lid on either side of the bucket. Drill two holes on each side of the 4 marks so that you can run zip ties through them. Drill four holes in the side of the bucket to run the zip ties through. Add zip ties. Duct tape the zip ties on the bottom of the lid to prevent moisture from getting inside the lid.


6. To make the mixer blade, draw two 4 x 7 1/2" squares on the ice cream maker aluminum inner bucket, and drill 8 x 1 1/4" holes in them. The cut out and flatten the two pieces.


7. Attach the flattened pieces to the plastic blade that came with the ice cream maker with 4 zip ties each, and curve as you like. Add this blade to the end of the long copper tube, ~ 1" inside the tube (you can heat the copper tube with a blow torch to make this easier... do it in a vented room).  Drill a hole through the copper tube and plastic blade and add a 1/2' metal screw to fasten (the drill bit broke off in mine so no screw necessary).


8. Place the lid over the mixer blade shaft, then screw it into the motor fixing and you are done! You can add a switch or a timer to the plug if you want to make it easier to turn on and off.


Note!  It's important to reduce both shear and oxygenation in the mash, both of which depend on your mixer design and mixing speed. I made this mixer tall by design, but have a feeling I will shorten it once I've tested out in an actual mash, if it A) rises above the grain bed B) vortextes the mash, or C) causes the mash to rotate with the blade.  If I do, I'll likely bring the blade down to 3" tall and turn it  away from the direction of rotation . I'll test this design out, and update this post.

So, after testing it out, there is quite a bit of drag using the "larger blade". Fortunately,  I still have the other half of the aluminum bucket from the ice cream maker so I decided to make an alternate blade that is shorter and has a thinner profile going through the grain bed.  It will have a lower blade that is wide to scoop the grain off the bottom of the tun and a thinner one higher up to help mix the grain on top:


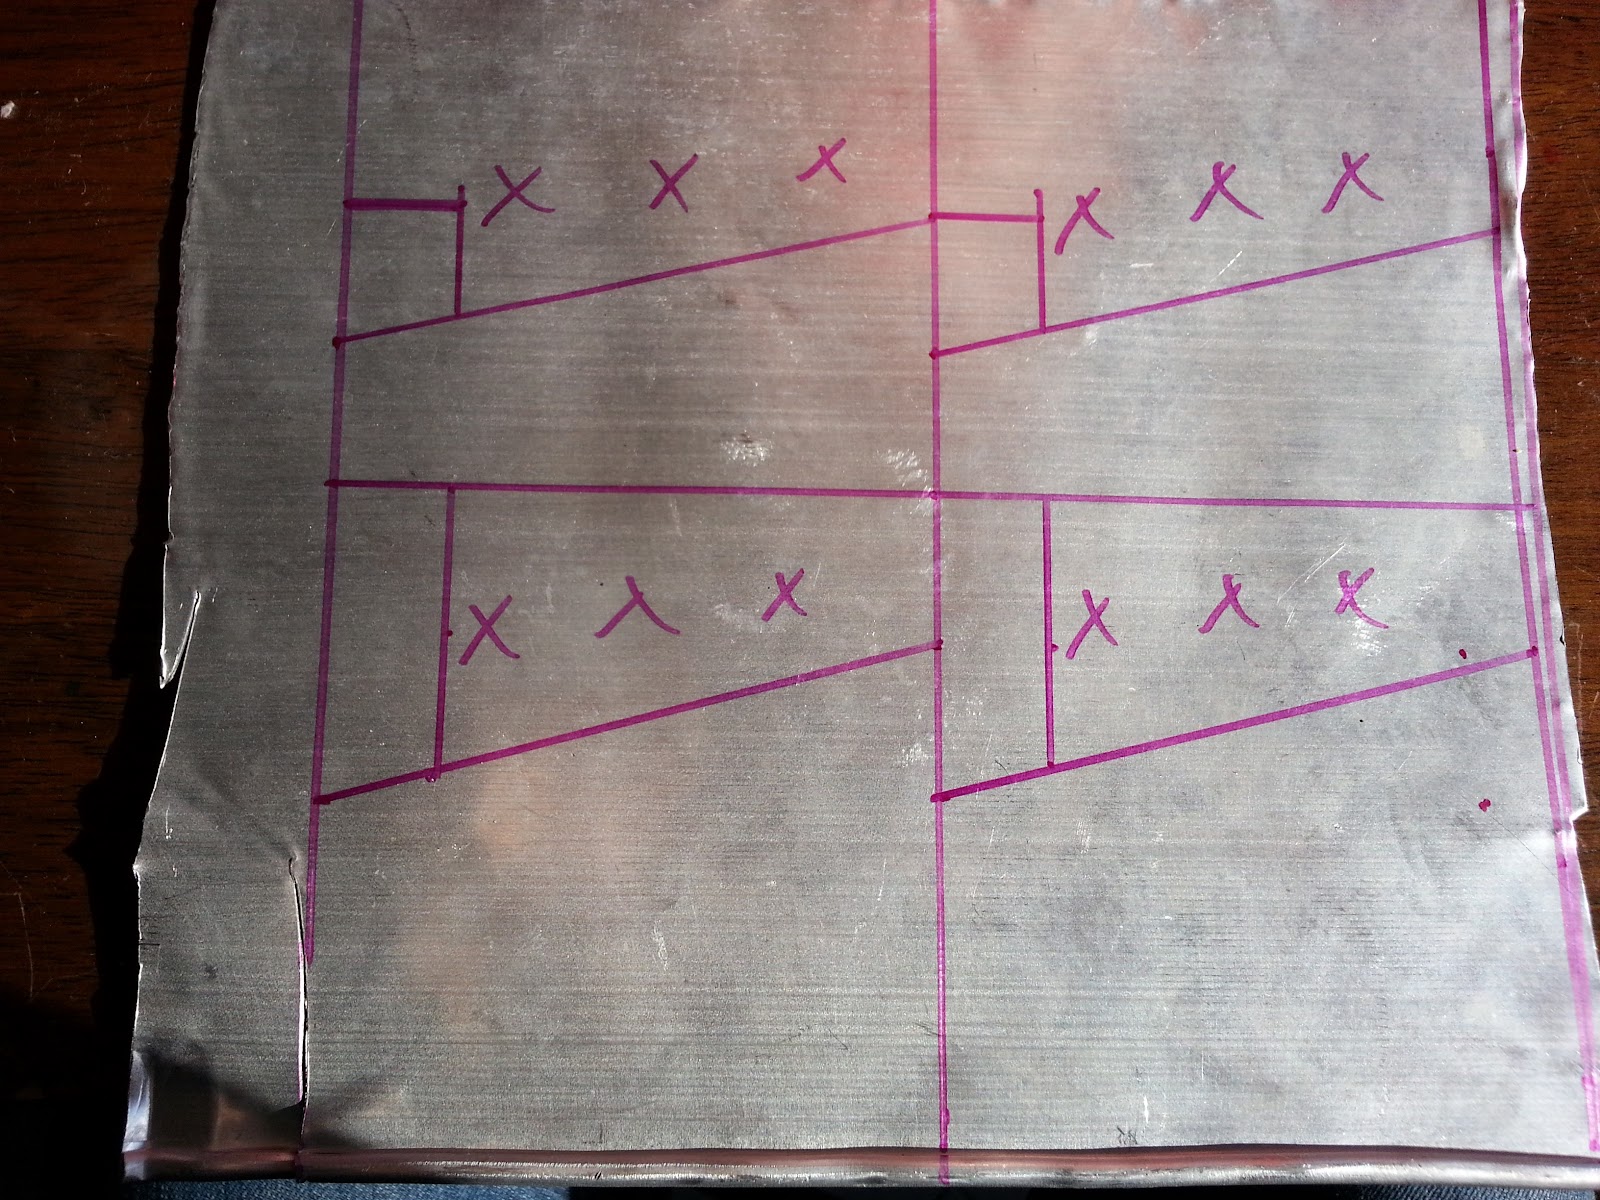
The xxx will be cut out. The blade is 4 x 5", with the bottom blade 2" at the base tapering to 3" at the end and the top blade being 1" at the base tapering to 2". The taper lets me bend the blade back so gain can fold over the top.  Once cut out, I zip tied it to the ice cream mixer blade and bent then to shape by hand.  These have less drag. So now I have a wide blade that can be used in high water to grist ratio mashes and a narrow one for more dense mashes.